Click on any photo for the full-size image
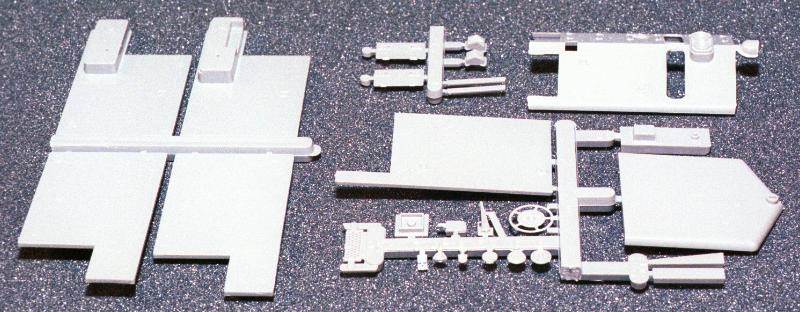 |
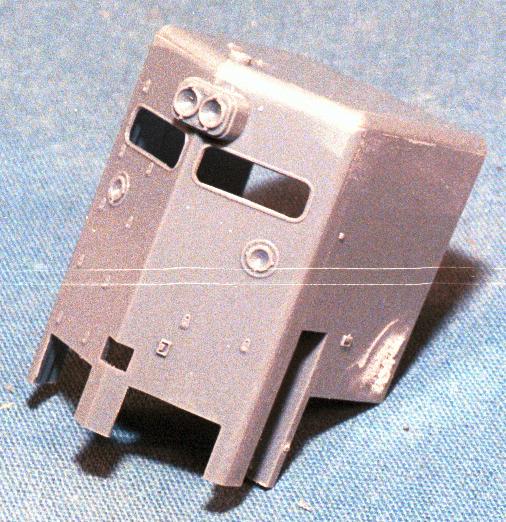
Here is the unassembled Cannon EMD high nose kit. This is one of those landmark parts that shaped a whole generation of model builders... I've heard at least five different people claim to be "the one" who convinced Gordon to do this part. All I know is, it wasn't me... but only because I didn't know him at the time. The Cannon high nose was released around the same time as the Front Range nose, or at least I found out about them both at the same time. I'm guessing about 1988 or so. The FRP nose was one piece for quick and dirty installations, but vastly inferior to the Cannon part... and it cost more! Cannon's high nose remains one of his best sellers and an indispensible part for an N&W or Southern modeler. Front Range did do a nose specifically for the GP30 (to fit the Moyers shell) but it would look awfully weak up against a Proto 2000 model. Anyway, in the Cannon nose you see on the left (unfortunately upside down in the photo) the four options for the left side. Blank (late SD40's and SD45's with long hood mounted brake wheels), flush mounted wheel (late Southern SD40-2), large ratchet opening (I'm told for some SR late units but lack photo evidence), and the small ratchet for everything else. The hood kit also contains two walkway light options, early and late. This nose is 81" in length, as were all EMD high noses from the GP35 onward. Contrary to some popular rumor, the high nose units did not go to an 88" length when the standard EMD low nose was increased to that length. |
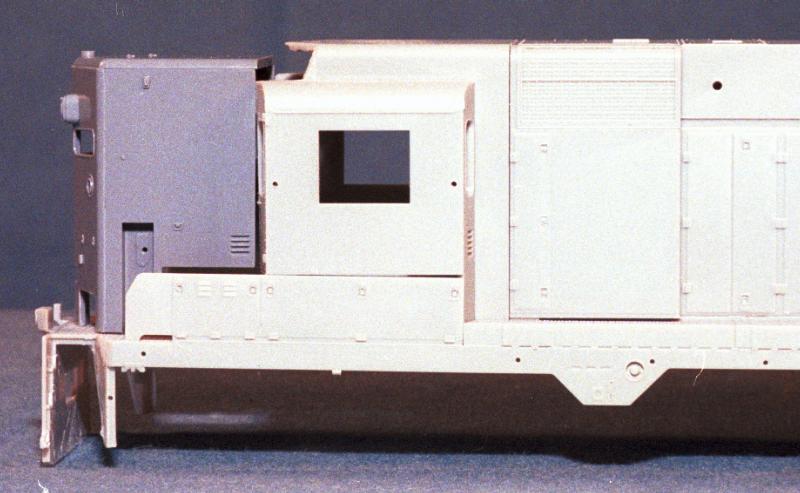 |
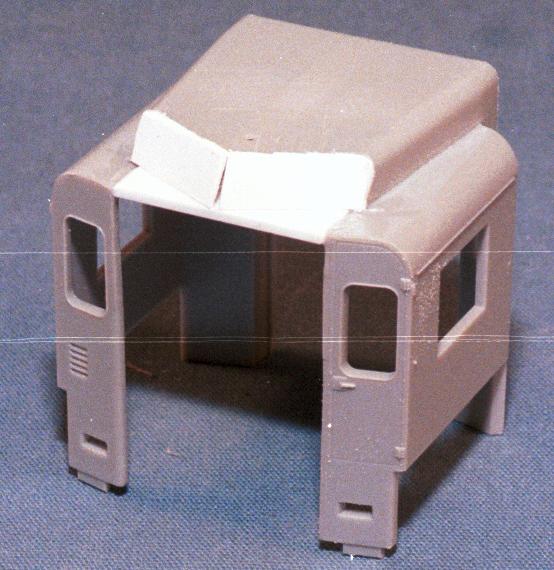
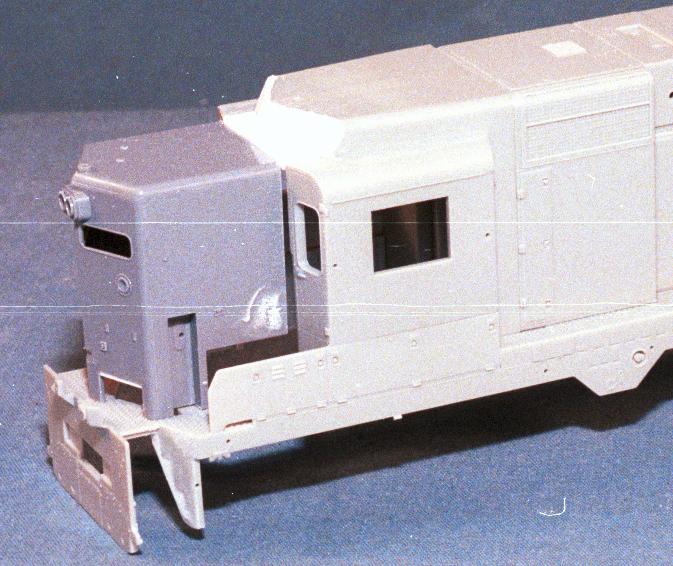
So what is different about the high nose on a GP30 from everything else? Take a look... I have assembled the Cannon high nose kit without gluing the roof piece in place. Here positioned on the GP30 it's very obvious the nose is too tall - it should be flush with the top of the cab roof at the bottom edge of the brow. Harder to see is the length of the nose - this nose is probably 6" longer than it needs to be, mainly due to the angled front cab wall which is still present even though there is no peaked windshield. Notice also that the GP30 body is just loosely stuck together which is why there are visible gaps under the cab, etc. |
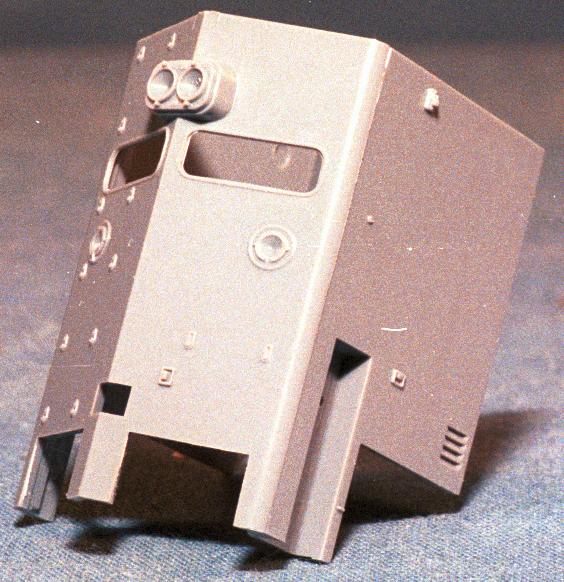 |
A closer look at the assembled (mostly) Cannon nose. The roof has been removed because the top has to be lowered to match the GP30's cab roof. I have also left off the sandbox sweep doors, and you'll see why soon. |
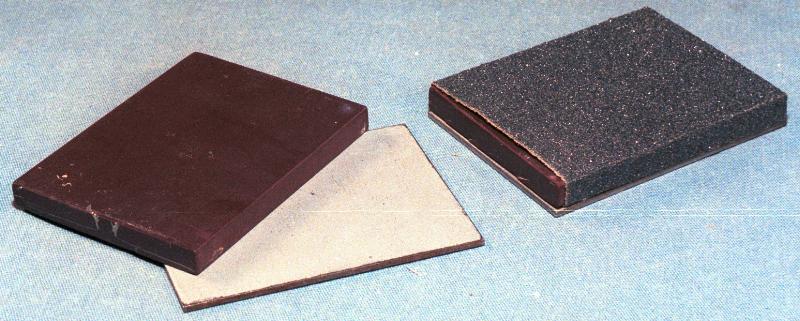 |
Another word from the Handy Andy Tool Kit. We're going to use this little trick extensively on this model. If the object on the left looks familiar, it should. It's a Kadee #308 uncoupling magnet. Actually it's the only Kadee uncoupling magnet that works, because it's powerful enough to pull carpet tacks down from the floor above. This one is designed to go below the ties, and still works just fine even when ballasted over. Unfortunately I long ago gave up the idea of "automatic" uncoupling. It requires the unprototypical wire trip pins, and automatic uncoupling is itself unprototypical. So I don't have much use for the 308 magnet, right? Wrong! It makes about the dandiest sanding block I've ever come across. The steel keeper plate is a great retainer, and it's tight enough that the sandpaper isn't going to come loose even with vigorous sanding. I use paper sandpaper... I gave up on the Mylar junk many years ago.. overpriced, poor performance, and it won't fold neatly like this. I like 3m's stuff, but to get the more exotic finishes, like 2000 grit, you have to shop around. I got piles of the stuff at one of those outdoor flea markets for pennies on the dollar, a nearly lifetime supply for about 40 bucks. Your friendly automotive or paint store isn't likely to have anything finer than 400 or possibly 600. The 2000 grit is so fine you could almost clean your glasses with it... but please don't do anything stupid like that! The author of this web site cannot be responsible for damage to eyewear on account of a misunderstood joke. Oh yeah, coffee fresh from the pot is HOT too, or at least it's supposed to be! |
 |
The top of the nose has now been lowered a bit, this was done using a piece of 150 grit sandpaper on plate glass for the bulk removal, and the Kadee sanding block for the more refined sanding and leveling. The hardest thing is to stop short of taking too much off. You have to square it up and keep it square, then stick the roof section in place and test fit. This type of fitting also requires caution in making sure the hood is held level when testing the fit, or else you can fool yourself into thinking it fits when it doesn't or vice versa. How much to take off the top? I have no idea. As you can see it is below the nubs for the top grab iron. I sand until it fits. Actual prototype dimensions would be nice, but the final product needs to fit the Proto 2000 GP30, and that's what I go by. Notice also that the little louver on the lower side has been sloppily filled in with Zap-A-Gap. This louver is not present on the GP30 and in fact overlaps part of the area that will be removed. |
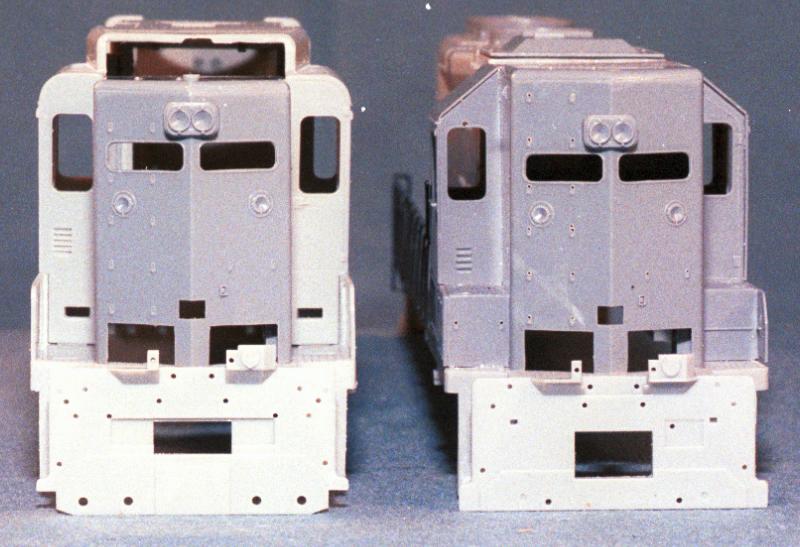 |
On the left is the GP30 with the nose test fitted in place. On the right is an Atlas GP40 with a Cannon standard high nose, cab, and sub-base in place. I wanted this photo to illustrate the height difference which it does, but due to the bottom of the pilot shape on the GP30, it's sitting a bit higher. As you can see the total roof height of the GP30 is taller than the GP40, but the top of the short hood is noticably lower. |
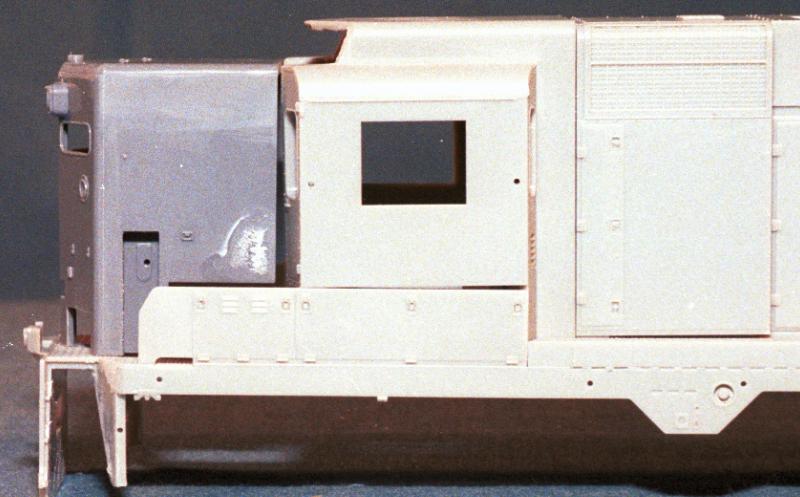 |
Left side view shows the top lined up but the length is still obviously too long. |
 |
Now it's time to go back to that gaping hole in the cab and brow from the last session. When I say I'm a cut close, file-to-fit kinda guy, I mean it! The flat piece of .040 styrene was cut to fit the width of the cab and square across the front, but the two angled brow pieces are just snips of .025" wide styrene, that I put a real hacker's bevel on the front of. Not even close, but they are butted against the bottom of the brow and glued in place. |
 |
Snip snip... this took about 30 seconds with the Xurons to cut most of the overhanging plastic loose. Looks better already! |
 |
The rough brow and the rough nose are joined together for this photo but there is more work to do on both, so they aren't glued in place yet. |
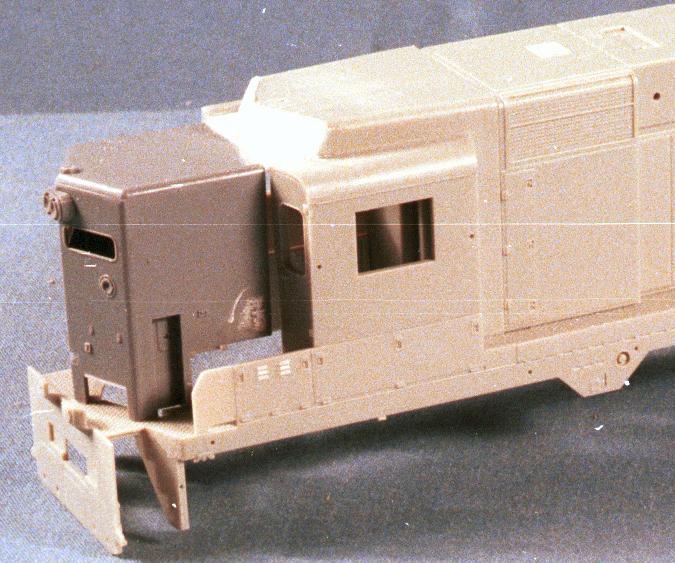 |
What happens when Andy's flash doesn't go off? Not bad, not bad at all... yellowish tone from the 3200K floods which really need tungsten film to work properly. We've now got about 4 hours into the GP30 altogether. |